Fenige Moneysend tutorial
This short tutorial helps you easily to use Fenige Moneysend API.
We show you how to correctly prepare REST HTTP request.
Thanks to that you will integrate your application with our system without problems.
+ +
Prerequisites
In order to make requests to our system you need to have credentials (username and password).
If you just have credentials, you can make requests by some REST client application.
In this tutorial we will use Postman and cURL applications.
All request we will execute on out test-environment (staging) that is available at this URL: https://java-staging.fenige.pl:8181
+ +
Authentication
To authenticate our customers in our system we use Basic Auth.
In order to authenticate you have to attach authentication header to request (explained further).
Your credentials should be correctly encoded by Base64 algorithm.
Between username and password colon sign (:) should be placed without any white spaces.
+ + For example:
+ Username: Fenige Test + Password: Test2000
In this case we need to build string like that: "Fenige Test:Test2000". Then we have to use Base64 to encode this string. + + After do that we should receive something like that: "RmVuaWdlVGVzdDpUZXN0MjAwMA==" (string with characteristic doubled equal sign at end). That’s all. We have our authentication header.
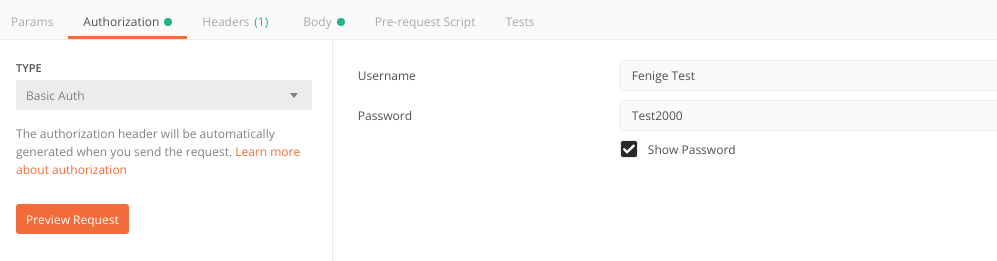
To easy authentication creation you can use Postman: + 1. In 'Type' menu choose 'Basic Auth' + 2. Type your credentials + 3. Press "Preview Request" button.
+
We can use cURL too. You have to provide your credentials by -u option in this format: 'username:password' Alternative for -u option is to attach your Basic Auth as header:
curl -H "Authorization: Basic eW91cl9tZXJjaGFudDp5b3VyX3Bhc3N3b3Jk" -X GET https://java-staging.fenige.pl:8181/api/v2/client/countriesAfter authentication process you can use our API.
Notice that in some situations you need to provide API-TOKEN as header in request.
You can retrieve this token in method: /client/login.
This token can be received by each active user that is saved in our database.
+ +
Headers attach and first request
Really important thing is to add correct headers to HTTP request. We can do this easily by Postman:

In cURL header should be placed in quotation marks with -H option in this format: "key:value"
curl -H "Authorization: Basic eW91cl9tZXJjaGFudDp5b3VyX3Bhc3N3b3Jk" -H "Content-Type:application/vnd.sendmoney.v2+json" -X POST https://java-staging.fenige.pl:8181/api/v2/client/send-moneyThen if we have attached Basic auth header and other required headers we must set correct URL address and request method.

In cURL URL address we can type after request method before -X option.
Summarizing, if we set correct URL address, request method, authentication header and other required headers then we can execute HTTP request.
+ +
First transaction
HTTP request is little more complicated if we want to send request body.
We need to do this in transaction process.
Here we’ll execute trial transaction in PLAIN-PLAIN model in accordance with https://documentation.fenige.pl/#c2c
First of add new request and set request method as POST. Then enter URL address the same as in documentation:

Then we have to pass authentication header, enter credentials and press "Preview Request" button.

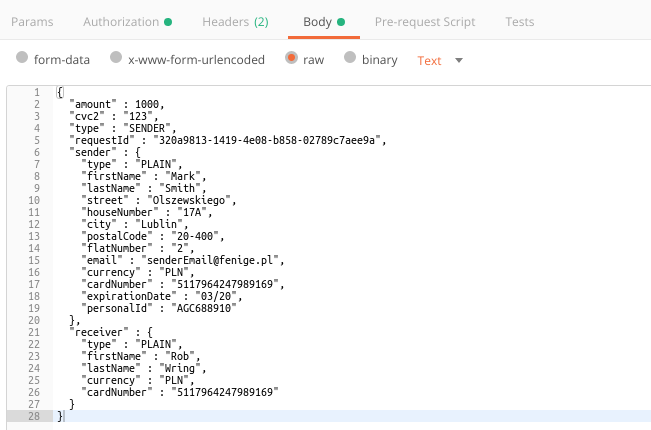
Next step is set correct HTTP request body. Go to 'Body' overlap, click 'raw' radio button and enter request body in JSON format. Warn! Please not change format of body because Postman will update Content-Type header by default. Remember that you need to enter new, unique "requestId" each time.
Now we can execute transaction by "Send" pushing. We should receive response like that:

That’s all. This transaction were processed with success. Now you can check transaction status in Fenige Admin Panel

In cURL the same transaction request look that:
curl -H "Authorization: Basic eW91cl9tZXJjaGFudDp5b3VyX3Bhc3N3b3Jk" -H "Content-Type:application/vnd.sendmoney.v2+json" -d '{"amount" : 1000, "cvc2" : "123", "type" : "SENDER", "requestId" : "120a9813-1414-4e08-b858-02789c7aee8a", "sender" : {"type" : "PLAIN", "firstName" : "Mark", "lastName" : "Smith", "street" : "Olszewskiego", "houseNumber" : "17A", "city" : "Lublin", "postalCode" : "2-400", "flatNumber" : "2", "email" : "senderEmail@fenige.pl", "currency" : "PLN", "cardNumber" : "5117964247989169", "expirationDate" : "03/20", "personalId" : "AGC688910" }, "receiver" : { "type" : "PLAIN", "firstName" : "Rob", "lastName" : "Wring", "currency" : "PLN", "cardNumber" : "5117964247989169"} }' -X POST https://java-staging.fenige.pl:8181/api/v2/client/send-moneyAt response body we should receive:
{"orderId":"120a9813-1414-4e08-b858-02789c7aee8a"}We can use orderId for example to check its status.
+ +
Method with X-USER-ID required
In this part of tutorial we show you how to receive X-USER-ID.
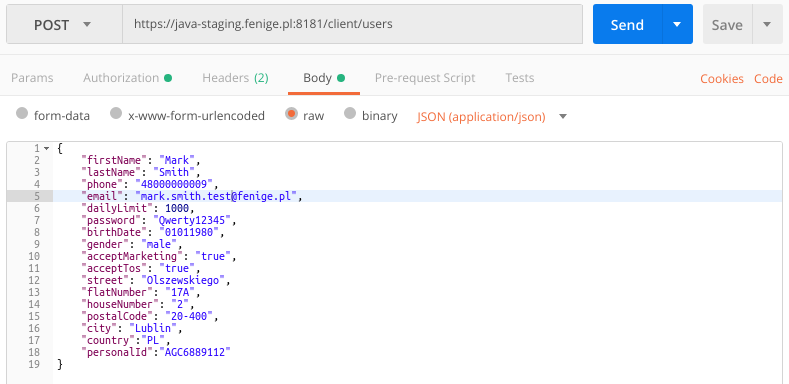
+ + First of all let’s add some new user:
In response we should get 'userId' of our new 'X-USER-ID' (in red rectangle) and 'status' should be success:

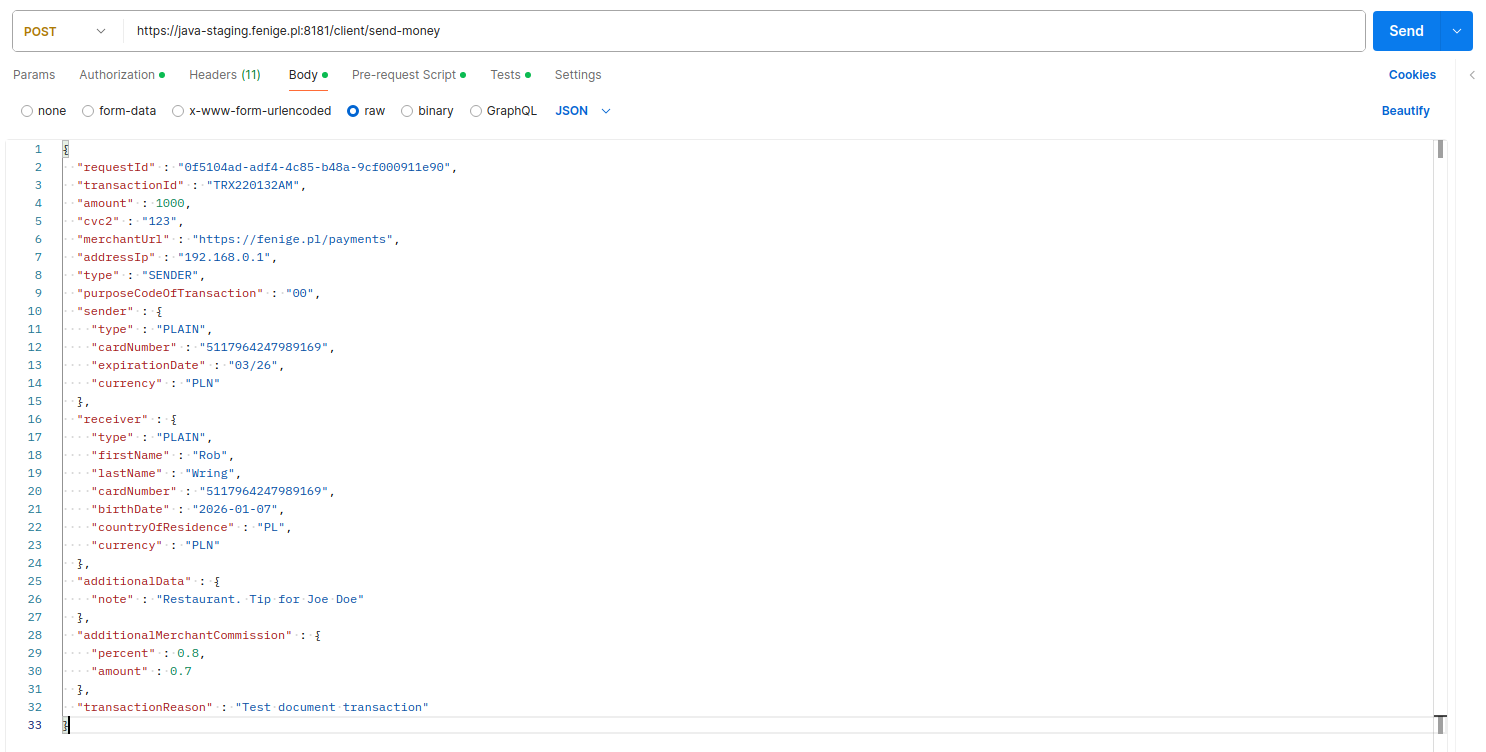
Now we’ve got all data to execute method with X-USER-ID required. For make our example more practical let’s used in MoneySend transaction when Sender identified by userId (X-USER-ID)


Everything went with success.
That’s how we went through basics of Fenige Moneysend API. We hope that it helps you in work with Fenige system.